Security Designer
General Description
The Security Designer is a cyber-security risk modelling tool. It enables the user to model a socio-technical system, identifies the threats to the system following the web of attack paths, proposes mitigations drawn from a detailed knowledgebase, and computes the risks from the threat likelihood and business impact. The software supports two standards: ISO 27001 and ISO 27005. ISO 27001 is about how organisations should manage information security risks. ISO 27005 is an asset-based risk analysis procedure, which is generally regarded as the best way to find and understand risks.
The Security Designer (SD) enables automated and systematic identification of risks to the assets (both human and technological) contained or connected to the ZDMP platform. SD also allows identifying the knock-on consequences and countermeasures to mitigate these risks. The tool allows collaboration between several stakeholders to develop the system model and the associated risk catalogue.
| Resource | Location |
|---|---|
| Source Code | Not available (proprietary) |
| X Open API Spec | Link |
| Video | Link |
| Online Documentation | Link |
Screenshots
The following images are illustrative screenshots of the component. 
Component Author
| Company Name | ZDMP Acronym | Website | Logo |
|---|---|---|---|
| University of Southampton IT Innovation Centre | UOSITI | http://www.it-innovation.soton.ac.uk/ |  |
Commercial Information
| Resource | Location |
|---|---|
| IPR Link | Security Designer |
Architecture Diagram
The following diagram shows the position of this component in the ZDMP architecture.
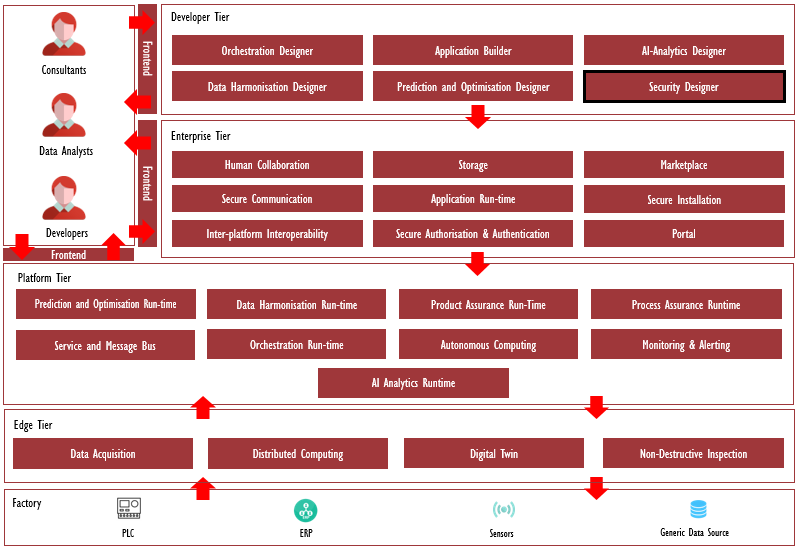
Figure 88: Position of Security Designer Component in ZDMP Architecture
Benefits
The Security Designer combines a comprehensive system model with an innovative machine reasoning technique and a detailed knowledgebase of threats and control strategies to create an unsurpassed view of the risks to a system.
Features
SD provides cyber-security assurance for the ZDMP infrastructure and process design. The primary and secondary threats to assets are automatically found, along with the corresponding control strategies, helping users understand what risk management measures are needed in their system. Based on the threats and controls encoded in the knowledge base, SD identifies the potential weaknesses of the model and suggests controls for addressing the nascent threats. This helps users to understand what measures are required to counter the threats. Security modelling is an iterative process which consists of the following stages:
User constructs a model by placing assets on the modelling canvas and creating links (relations) between the assets
Existing security controls are added to the model
The business impact of the different threat consequences (such as loss of confidentiality, integrity, and authenticity) for primary assets is also described
Software automatically finds the threats to the system and computes the risks
User addresses the threats with highest risk by selecting additional controls or by otherwise reconfiguring the model. The last two bullets are then iterated until the residual risk is acceptable
System Requirements
A (virtual) machine with a minimum of 1 (v)CPU, 4GB RAM and 4GB disc space is required to execute the Docker containers. The Docker and Docker Compose software are required.
Associated ZDMP Services
Required
Installation
To use the software, docker and docker-compose are required:
Download the “docker-compose.yml” file from the repository
Execute the command “docker-compose up”
Access the Security Designer at http://localhost:8089/system-modeller
How to use
The usage of Security Designer can be described by the following activities (for detailed description please refer to the online tutorial).
Getting started
If the user is new to the system, they must first register a new user account.
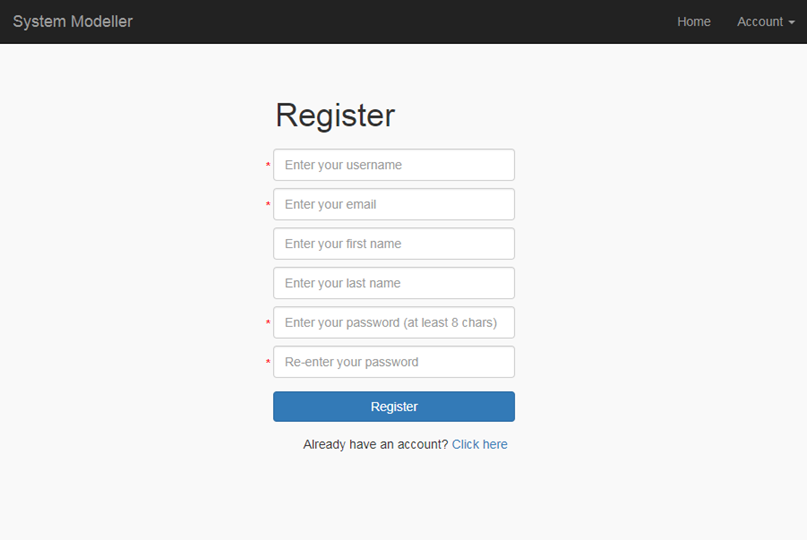
Figure 89: Register User Screen
Once the form has been validated, the user will receive a message “Registration pending
confirmation. Please await an email confirming activation”. The user must then wait for the
Administrator to approve the new account, at which point the user will receive a
confirmation email.
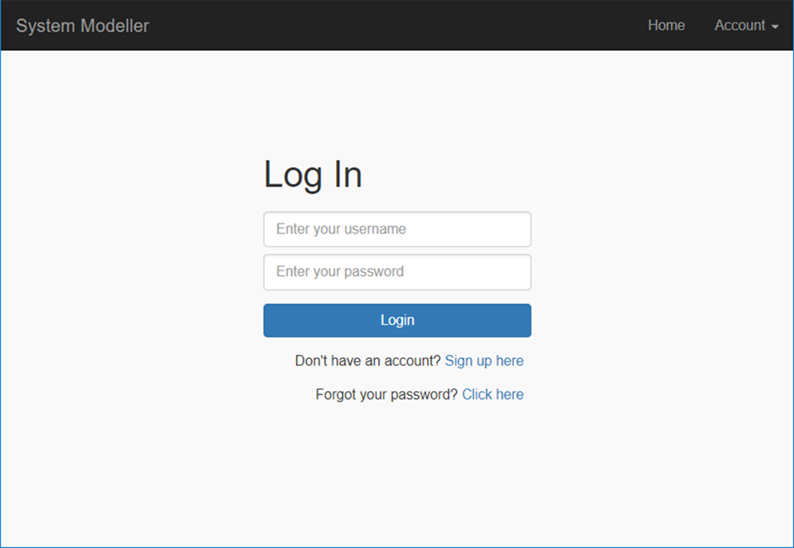
Figure 90: Login Screen
Model management
Model management involves: Listing models, creating models, Importing/exporting models and Deleting models. “Model” means a network of assets (for instance, networks, servers, software processes) interconnected by links representing their relationships. An example of a model is provided below in the “Model construction” section.
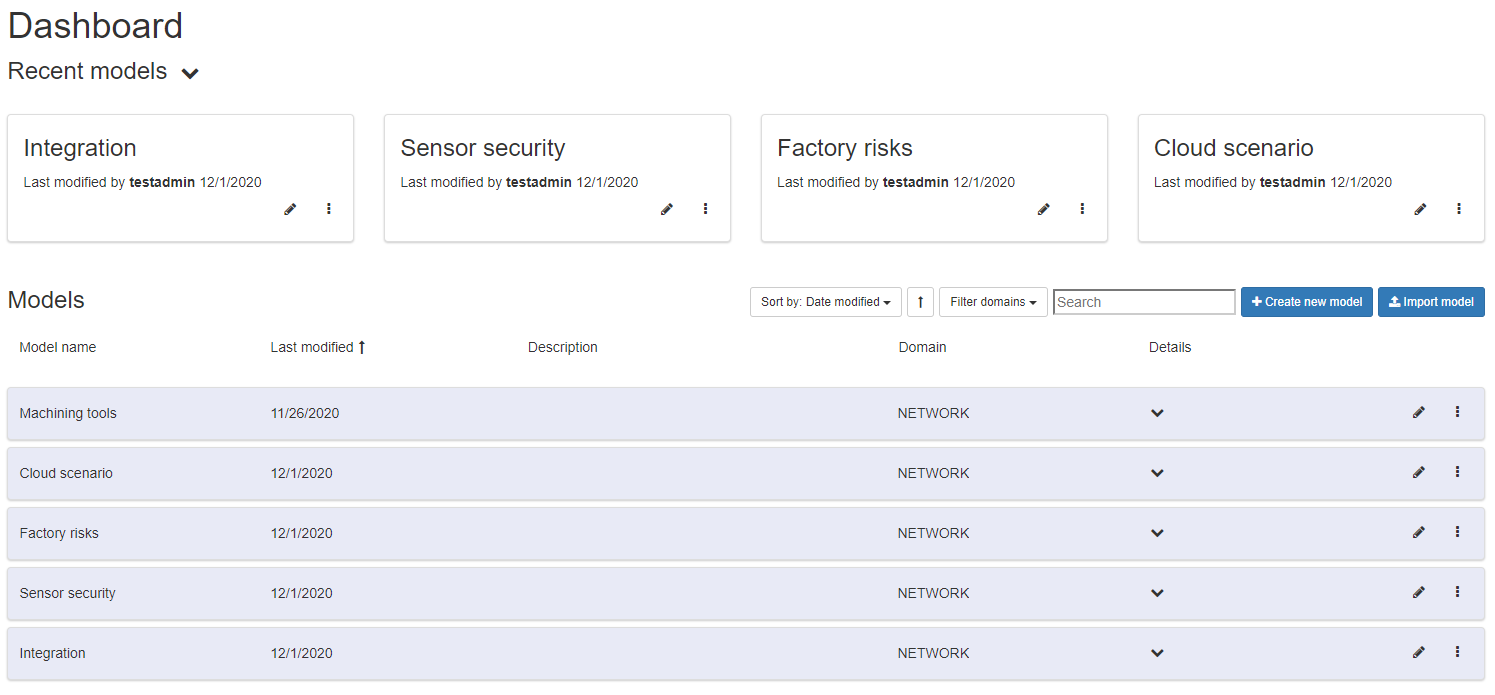
Figure 91: Model Management Dashboard
By clicking on the “Create New Model” button, the user can create a new model. The “Domain Model” drop-down allows the user to choose which domain model to use.
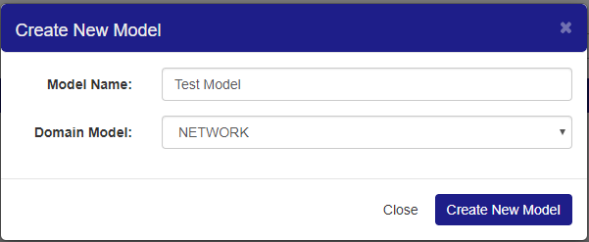
Figure 92: Create New Model Dialog
The Import operation allows the user to upload a previously saved file into a new model. In order to do this, the user clicks on the “Create New Model” control and selects the “Import Existing Model” option.
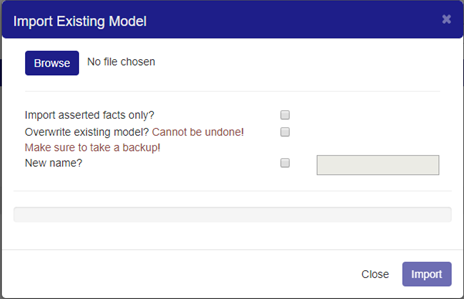
Figure 93: Import Existing Model Dialog
Model construction
Model construction involves operations such as: Select and add an asset. Adding relationships between assets, deleting assets, deleting relations, and Renaming assets.
Clicking the Edit button (on a model in the models list) opens the model editing page that consists of three main parts. On the left side is the “Asset Palette”, in the middle the Model Construction Canvas and, on the right, the Model Summary.
These are described below. Asset Palette: contains icons representing the asset types (eg “Fixed Host” can be found under the NetworkAsset tab) that may be added to the model. Model Construction Canvas: the main area for designing/displaying the model. Model Summary contains these items: Details, Assets, Controls, Misbehaviours, Threats, and Compliance.
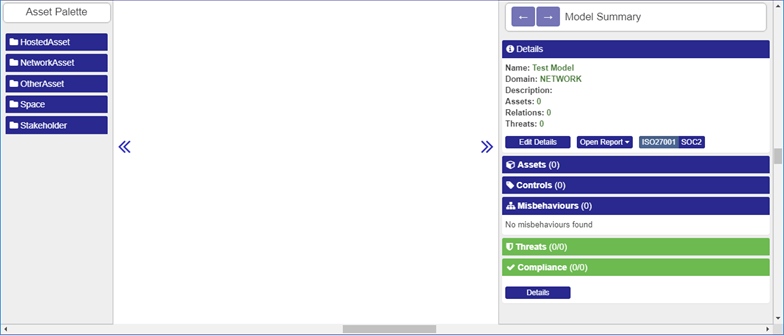
Figure 94: Asset Palette
Once the assets have been put onto the modelling canvas, the user can connect pairs of assets by establishing links between them, by clicking on the green cross that appears in the top left corner.
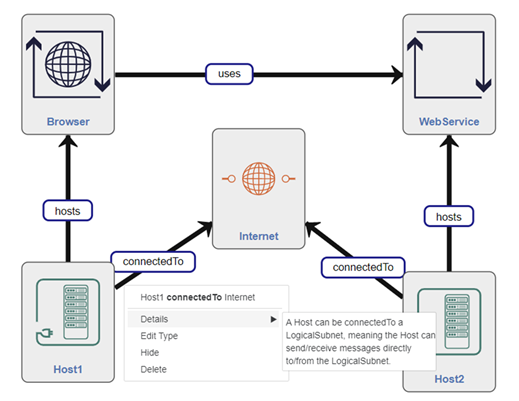
Figure 95: Example Workplace View
Model validation
Once the model has been constructed, it then needs to be validated. The validation operation runs semantic reasoning that generates inferred assets and relations that are added to the model automatically and produces a list of threats and misbehaviour sets that can be associated with the given model. This operation guarantees that the inferred assets are consistent with the asserted assets and relationships.
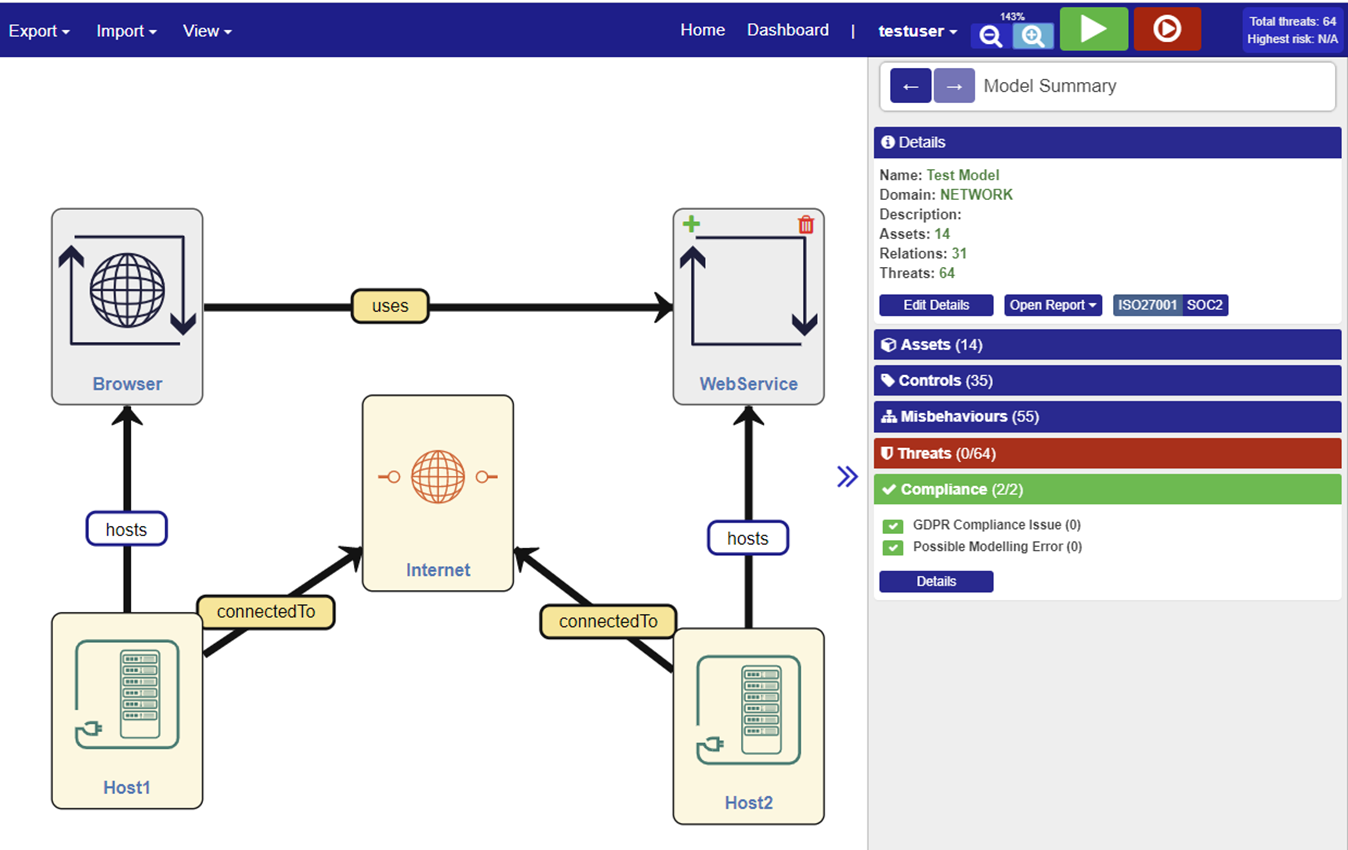
Figure 96: Model Validation View
Risk Calculation
The business impacts of the different threat consequences (for example, loss of confidentiality of a dataset) on the primary assets are then configured. By combining this information with the computed threat likelihoods, the risk levels for all threats and consequent misbehaviours can be calculated. The Risk Calculation is launched via the “Calculate risks” button.
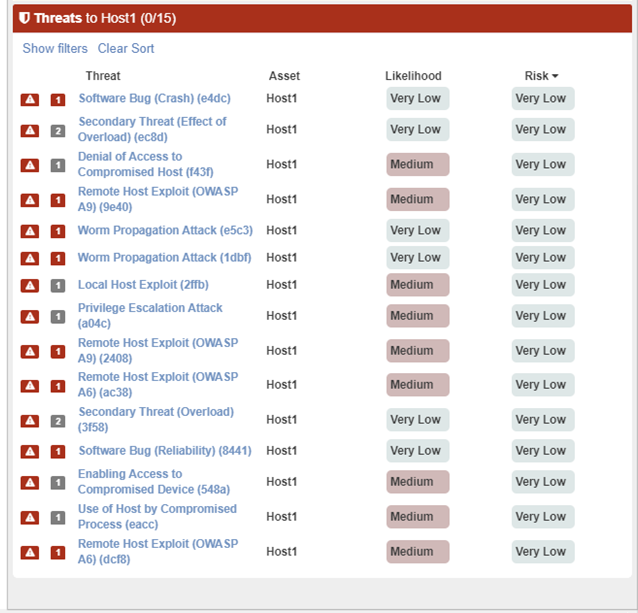
Figure 97: Risk Calculation View
Threat management
Once the risk calculation has been performed, the problems can be viewed and managed either by looking across the whole model or at an individual asset level. Either route accesses the same misbehaviour and threat explorer panels in the end.
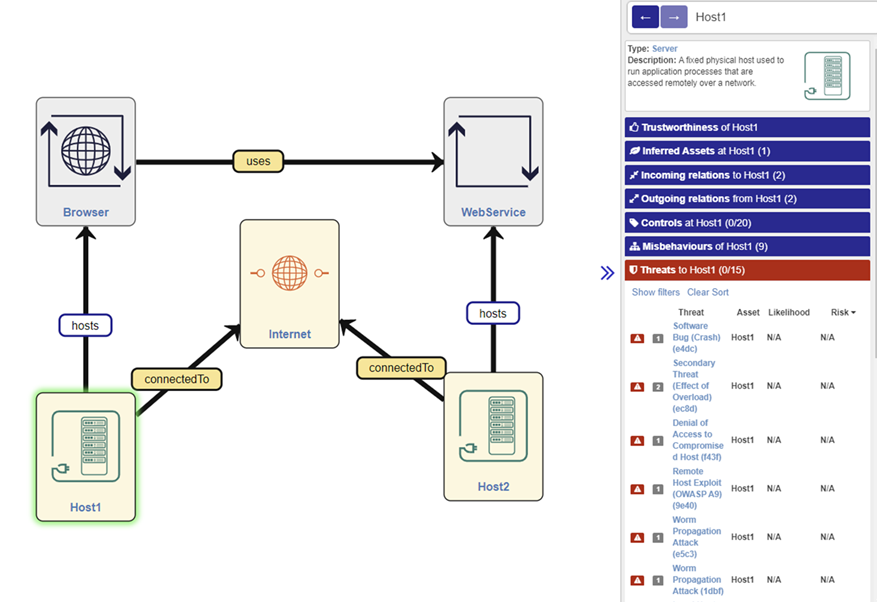
Figure 98: Threat management view
Regulatory Compliance
The Compliance panel summarizes any Compliance Sets that have been defined, according to the domain model. Each Compliance Set indicates any associated Compliance Threats that must be addressed, for regulatory compliance to be achieved for that jurisdiction.
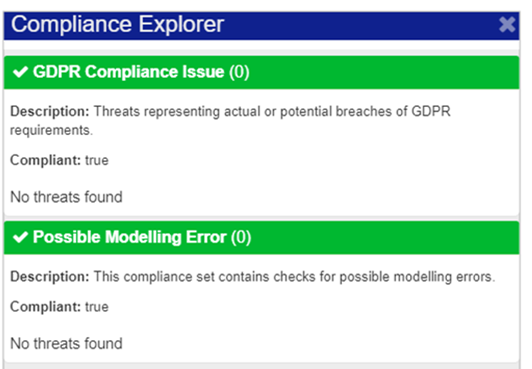
Figure 99: Compliance Explorer
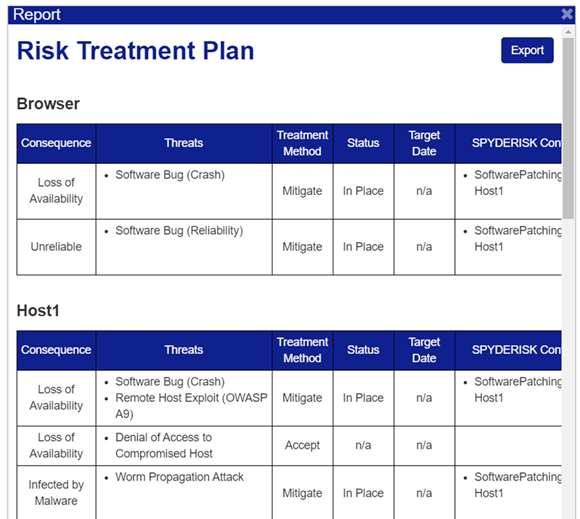
Reporting
The Security Designer allows the generation of two types of reports by clicking on the “Open Report” control in the “Details” frame of Model Summary. These reports show the status of each asset and also the status for each part of ISO 27001 Appendix A. The reports can be saved in HTML format by clicking on the “Export” control.