Secure Installation
General Description
The Secure Installation component provides the means to securely install applications on the ZDMP platform. This component acts on behalf of the user when they request an installation of a zApp through the ZDMP Marketplace (the trustworthy Marketplace developed for hosting zApps). It allows a secure downloading process from the Marketplace, and the policies the zApp is requesting (eg access to databases). A given zApp is not directly installed in the ZDMP platform unless it passes the review of the IT administrator. By leveraging the Security Command Centre UI, the IT Administrator can then accept or reject the policies a given zApp is requesting. Once approved, the IT administrator can then install the zApp (deploying it into the Application Runtime). Additionally, through the Security Command Centre UI the IT administrator can install a Certificate Authority (CA), as well as issue a client certificate for any of the installed CAs.
| Resource | Location |
|---|---|
| Source Code | Link |
| X Open API Spec | Link |
| Video | Link |
| Documentation | Link |
| Marketplace | Link |
The date of generation of this component content is: 6 May 2021
Screenshots
The following images are illustrative screen shots of the component
Figure 41: Secure installation overview
Component Author(s)
| Company Name | ZDMP Acronym | Website | Logo |
|---|---|---|---|
| IKERLAN | IKER | www.ikerlan.es |  |
Commercial Information
| Resource | Location |
|---|---|
| IPR Link | Link |
Architecture Diagram
The following diagram shows the position of this component in the ZDMP architecture
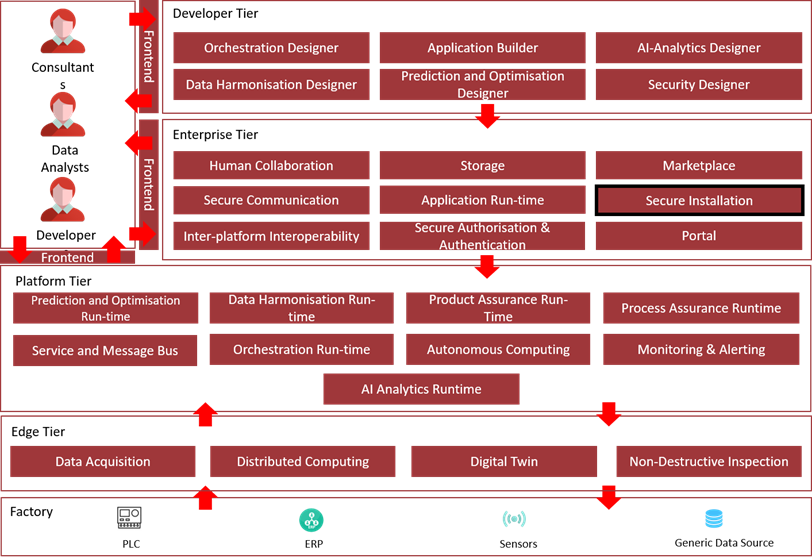
Figure 42: Position of Component in ZDMP Architecture
Benefits
Configure and revise zApp permissions before they are installed to the ZDMP platform, so that they only have access to those components that are essential, enabling the least privilege policy and avoiding unwanted access
Deploy zApps to the ZDMP platform semi-automatically, to save time and effort
Features
The features to achieve the functionality of this component are itemised below and explained thereafter:
Security Command Centre
Installation Broker
Security Command Centre
The Security Command Centre is the main subcomponent of the security component architecture. It provides the following features:
Security policies creation: Security policies can be created/reviewed in this GUI. This process is conducted each time that a new zApp is approved for installation so that its access permissions are well established
User policies creation: Security administrators can register and edit roles for users and zApps that permit access to ZDMP resources (eg to the storage component) in this GUI
Security certificates control: In this function, the installation of new root certificates and the revocation of user certificates can be done. These actions are critical to keep the ZDMP platform secure and can be triggered manually by a security administrator
Installation Broker
The Installation Broker Service is the module that supports the Security Command Centre in the downloading and installation of a new zApp. It provides the following features:
ZApps installation: Users request the installation of the zApp package through the Security Command Centre UI. Then, the user must accept all the policies specified by the zApp request and the installation to the application-runtime environment is processed
ZApps verification: The Installation Broker Service conducts the security checks, such the manifest signature verification, on the downloaded zApp package
ZApp permissions creation: When the security checks are successful, the Installation Broker Service requests the Security Command Centre to create relationships between the user, the zApp and the required permissions
- Multitenancy: The component at hand is able to store and manage data from different organizations (tenants)
System Requirements
Minimal requirements needed:
Computer with Docker Engine installed (tested in v19.03.8, on Windows)
The average resources needed to run this component are: 2 CPUs, 2GB memory and 10GB free space on disk
Installation
The installation of this component is performed using rancher UI:
- Find the appropriate helm chart in the configured catalog. The chart name is zdmp-secure-authentication

- Select the latest template version of the chart (as of the time being, v3.0.0)

- Provide your own credentials used to fetch the catalog (ie use HCE Gitlab credentials)

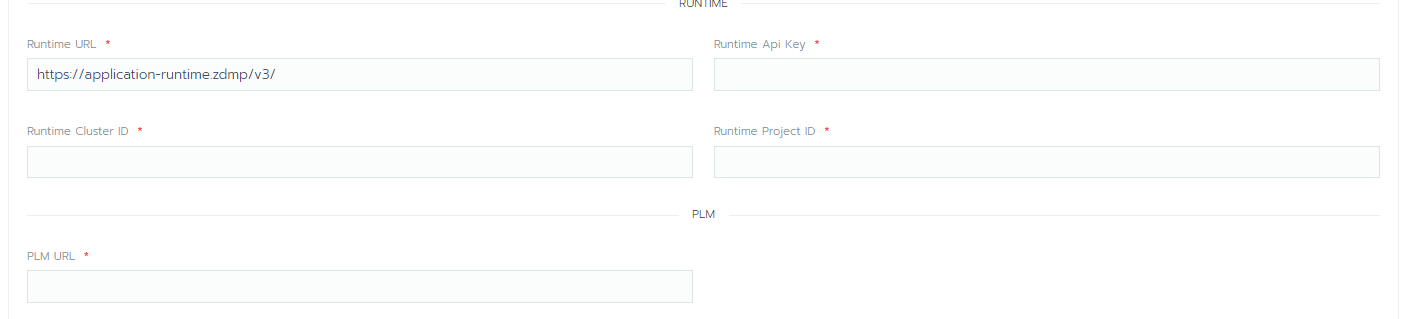
- Pay stay special attention to the domain variable. If deploying in the reference platform, use platform.zdmp.eu, otherwise for miniZDMP use the zdmp.home. Also configure the storage type accordingly. For the reference platform use NFS and for miniZDMP use hostPath

- Obtain the current rancher catalog ID and project ID from the URL. For the API Key, go to the appropriate tab in rancher and generate a new key. Finally provide https://product-license-manager-zdmp.platform.zdmp.eu/ for the PLM URL field
- Launch the deployment and get the ingress URL from rancher
How to use
The insights on how to use this component are itemised below and explained thereafter:
Access to the Security Command Centre UI
Retrieving zApp Installation Requests
Creating zApp Installation Requests
Reviewing and deploying a zApp to the Application Runtime
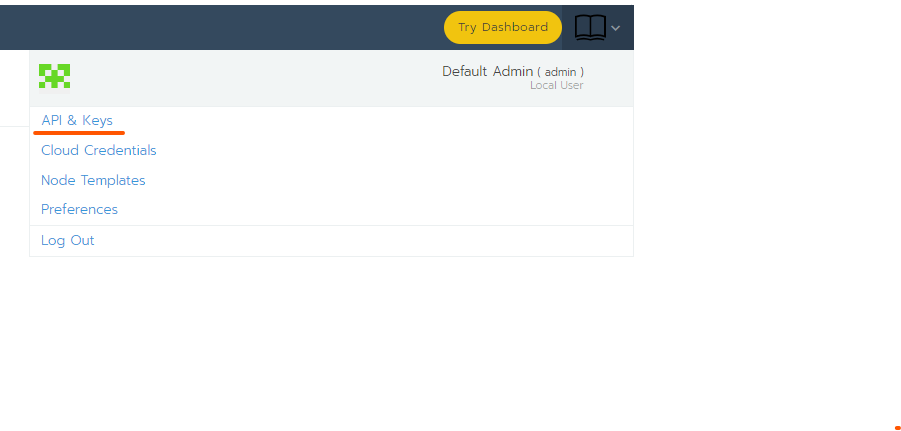
Access to the Security Command Centre UI
Once subsystems are launched the Security Command Centre UI can be accessed at http://localhost:3000 if you are using a local version of the component, or https://security-command-center-zdmp.platform.zdmp.eu/ if you are using the Cloud version.
The browser renders the following login page:
The Dash Button component manages the authentication process. Once completed, the user gets redirected back to the Security Command Centre UI.
Note: The logged user should have the ZDMP_IT_Security_Commander role, otherwise it is not allowed to interact with the system.
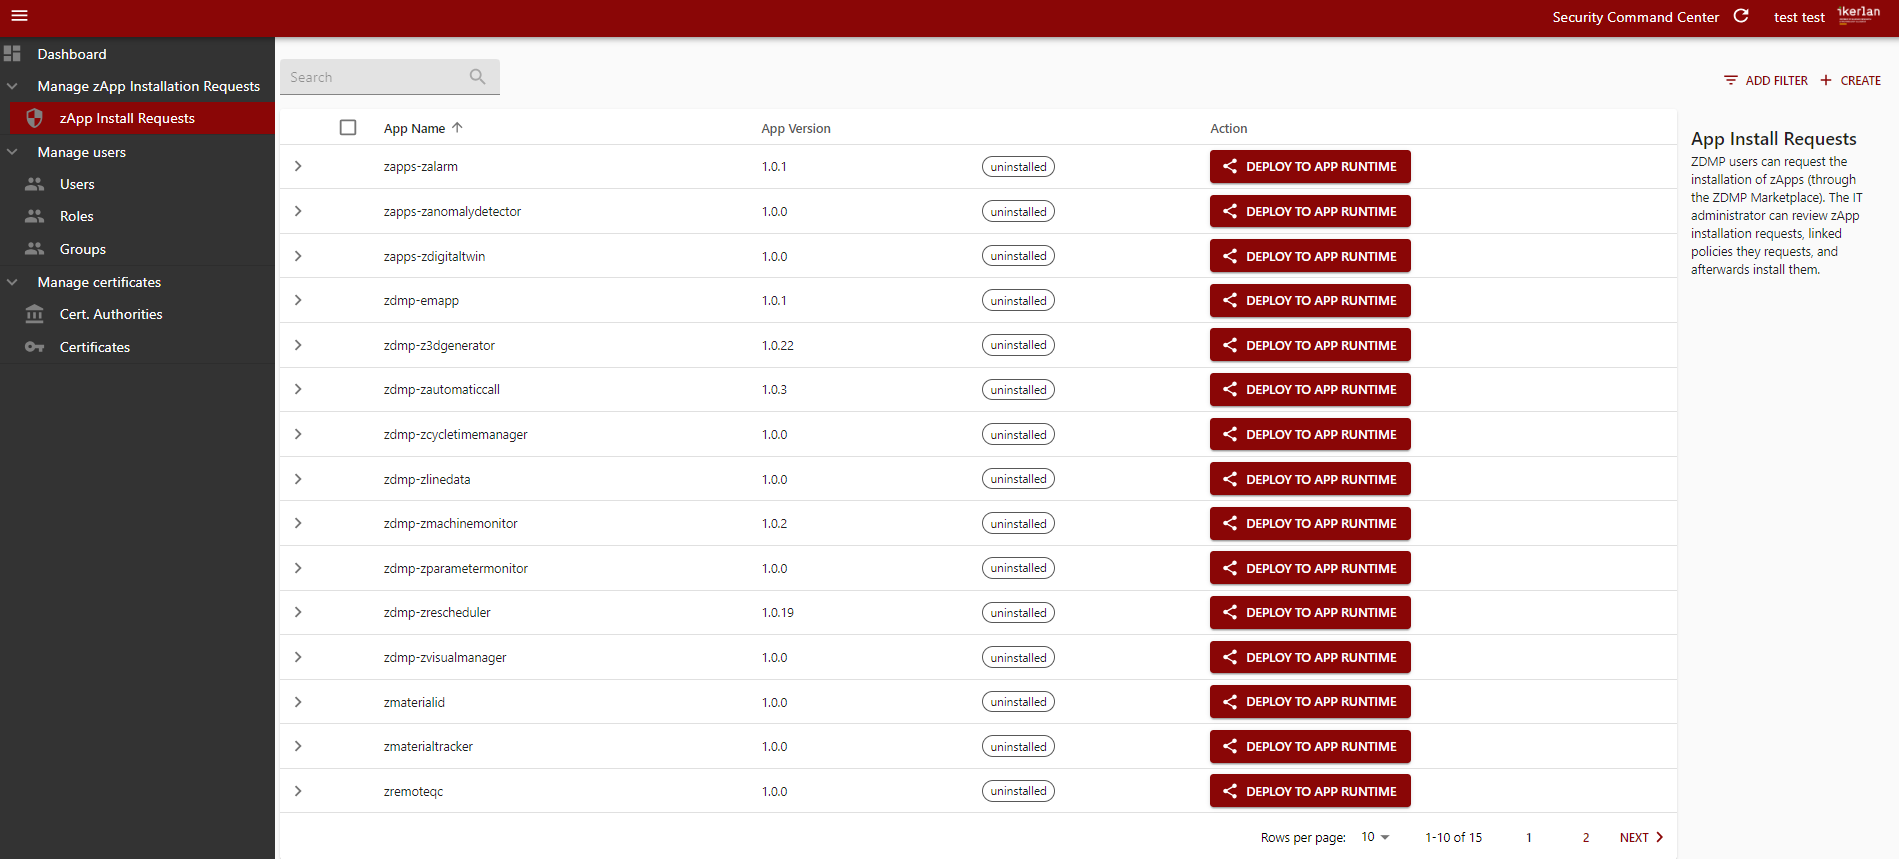
Figure 43: Security command centre UI – zApp Install Requests
Retrieving zApp installation requests
Once logged in, the zApp installation requests list can be viewed by clicking on the left menu “zApp Install Requests”.
Here the IT administrator can view the zApps already installed and the ones that are available to be installed.
To launch the installation process, the user must simply click on the deploy to app runtime button and proceed with Deploying a zApp to the Application Runtime instructions down below.
If the left arrow of an installed zApp is clicked, a new panel is displayed with the list of URLs associated with that zApp. The number of displayed URLs depends on each zApp and how they were developed (zApps developers decide which subcomponents will have a URL and at least one is expected per zApp). If no URLs are shown, please refresh the page after a couple of minutes. If after some time there are no URLs listed, contact ZDMP.

Deploying a zApp to the Application Runtime
Those zApps in the PARSED_MANIFEST status, requires one last step to actually deploy them to the Application Runtime component. That is because each zApp has some configurable parameters defined by the zApp developer, but the platform cannot infer those values and thus the user must specify them manually.

By Clicking on the “Deploy to App Runtime” button, a new modal window is displayed with the mentioned configuration form:
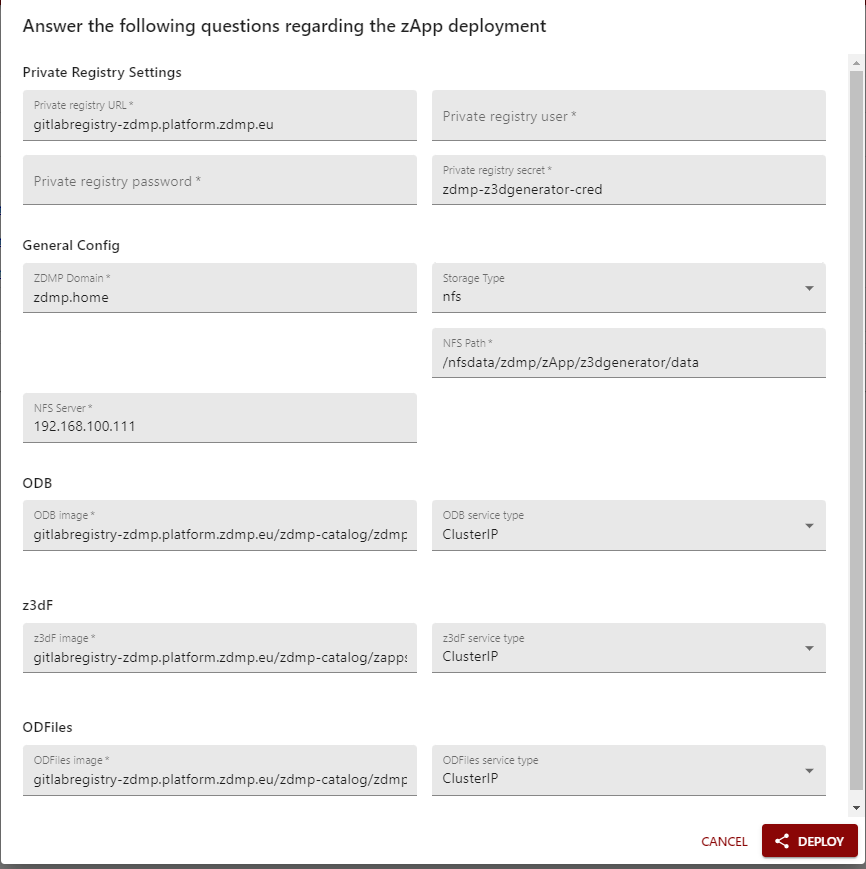
Some fields will have a default value set, but others will not. If you do not know how to complete the form, please contact the zApp developer as this form is dynamically generated based on some parameters defined by the developer.
Once the form is completed, click on the “Deploy” button and your zApp should change to the DEPLOY_SUCESS status. Checkout the Retrieving zApp installation requests section for more details on how to obtain the URLs for accessing the zApp.